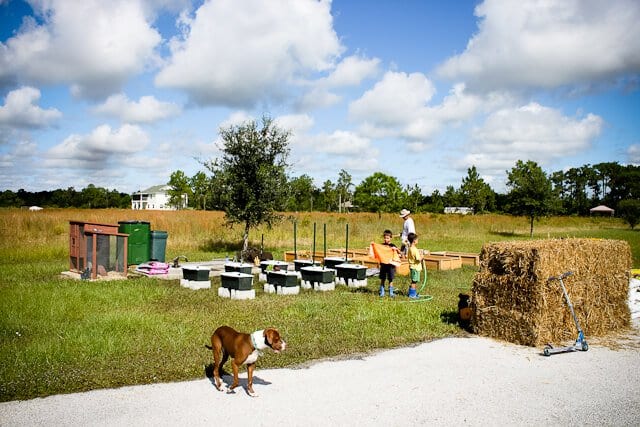
This past weekend of 9/11, we decided that the best way to honor those who had died, those brave souls who saved lives and those who are fighting the war on terrorism was not to sit glued in front of the television watching the remembrance shows or live ceremony, but rather to be outside and create our very first family garden in our new home. We thought there’s no better way to honor humanity than to build a fruitful garden that will feed our family and friends.
It was good to be outdoors, though it was hot! hot! hot!!!! We alternated between the garden and the pool for most of the weekend, jumping in the cool water every hour, though I kept on forgetting to reapply my suncreen every time….so I ended up with a crooked tan line where my boots stooped mid-calf.
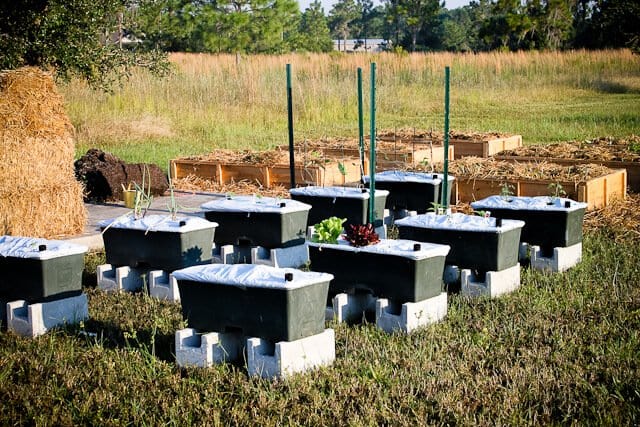
At our old house, we always had several EarthBoxes going, it was the easiest way to pretty much a foolproof garden. The soil here in Western Florida sucks. It’s so sandy that all of the good nutrients that you put into the soil just gets washed away or drains quickly down, so many of us create raised beds or grow our garden in containers. We chose EarthBox because the inventor, Blake Whisnant lives in the next town over and his EarthBox Research Center is just minutes away. (btw, I’ll post about the other raised beds that Scott made in another post – we’re experimenting with no-dig lasagna gardening)
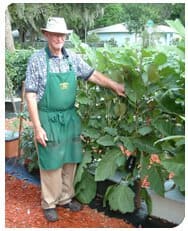
Photo from EarthBox Research Center
Blake is in his 90’s and still goes to work at the Research Center every single day. You can either spot him out in the garden area, talking with customers and teaching them the best way to grow their tomatoes or inside the shop on his rocking chair. What makes his EarthBox system so great is that the entire container is enclosed, soil sits ABOVE the water — all which results in using less water, less fertilizer, no erosion and zero weeds. This is certainly NOT a paid post by the way, we’ve been using the EarthBoxes for 7 years now, from the recommendation of good friend, Jan Small who happens to be the Expert Heirloom Gardener for Zone 9 with the Fabulous Beekman Boys’ World’s Largest Community Garden.
All of the potting mix, fertilizer and water is contained and protected. The box is covered with plastic and all you have to do is water every few days – just stick the end of a hose in the black tube. The water goes right to the bottom of the box.
The EarthBox is quite expensive (about $30 each), especially if you calculate shipping costs for them to get to you….but you can build your own very easily, either out of plastic tubs or buckets. What’s important is that the containers utiilize soil wicking system, which allows the soil to act as a “wick” to absorb the water up, taking in only the water that the soil and the plants need.
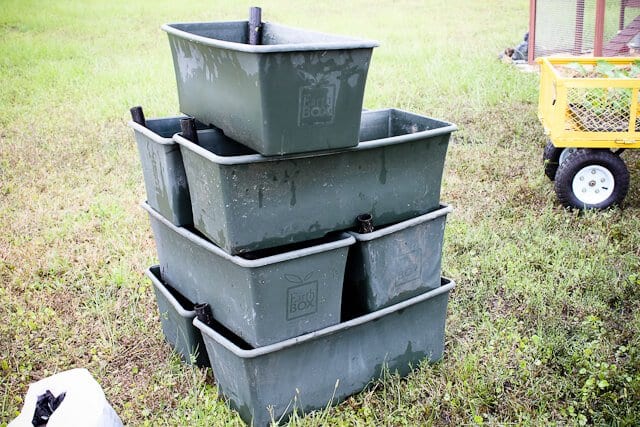
Here, we’ll show you.
How to Garden in EarthBox
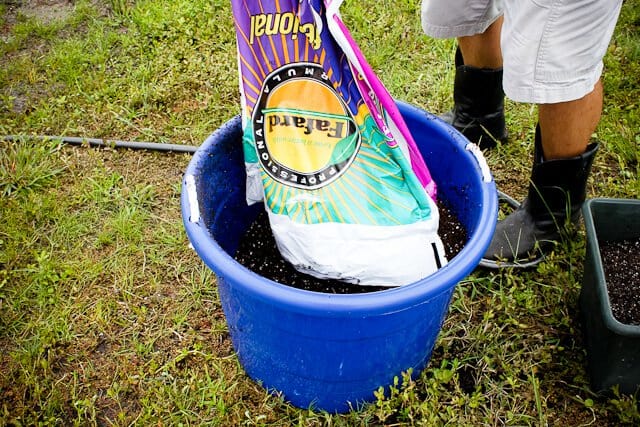
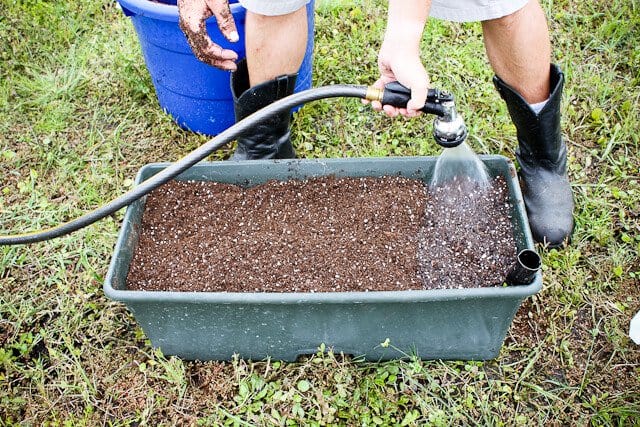
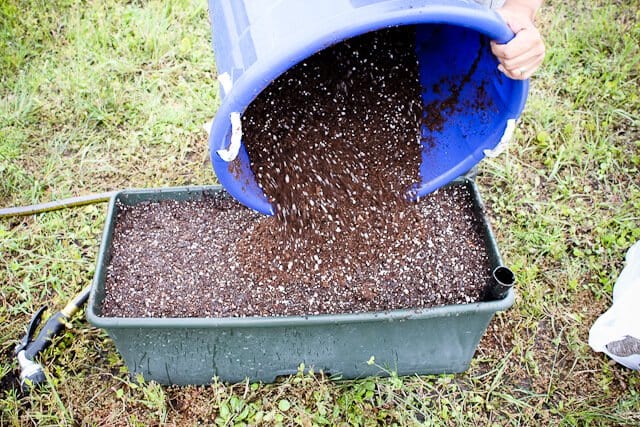
The first step is to get a big ol’ bucket (or you can use a wheelbarrow). Add about half of a 40lb bag of potting mix. Wet the potting mix and mix until the potting mix is fairly wet and stays together when you squeeze it.
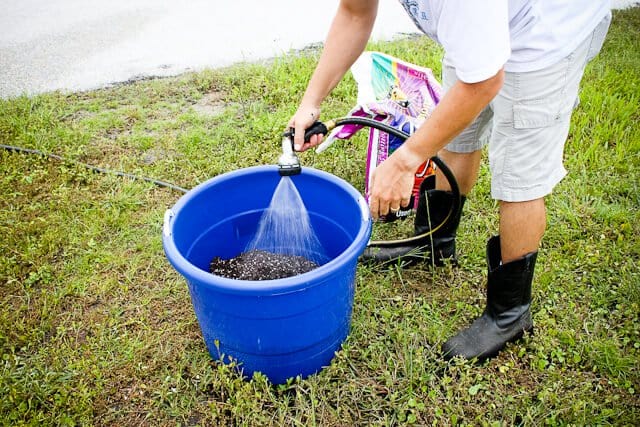
Mix well.

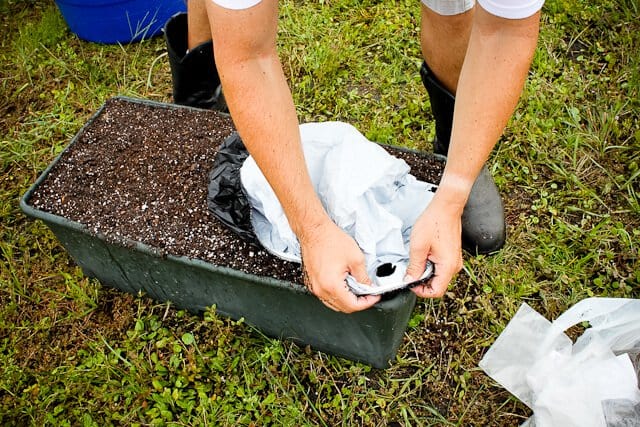
Put the screen and the watering tube in and pack handfuls of potting mix in the corners of the Earthbox — these are your “wicks”. The screen sits a few inches above the bottom. The water sits below the screen. See where the potting mix is – the screen is open in those corners and you’ll pack in the potting mix very tightly into these corners. The potting mix acts like a “wick” to draw water in and up to the plant.
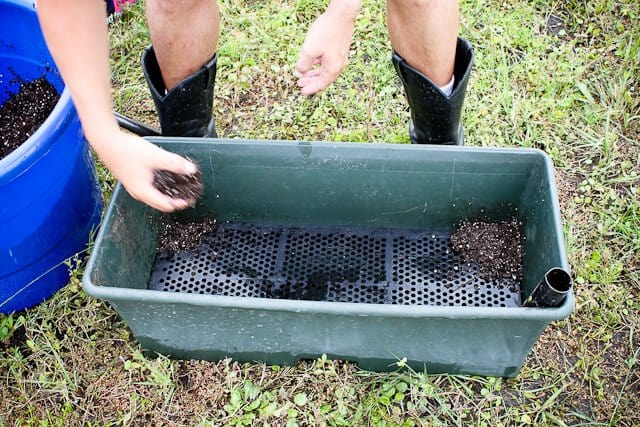
Pack down tight.
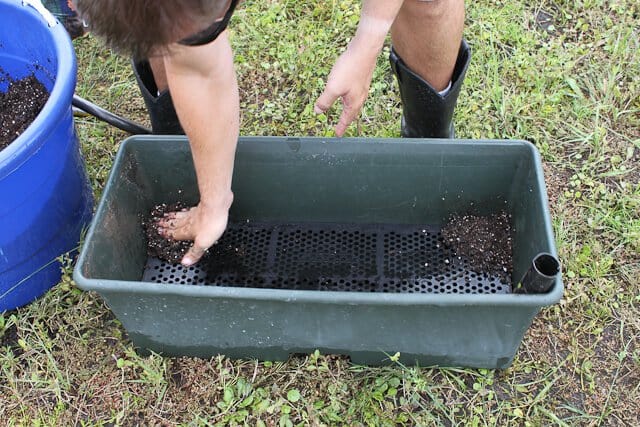
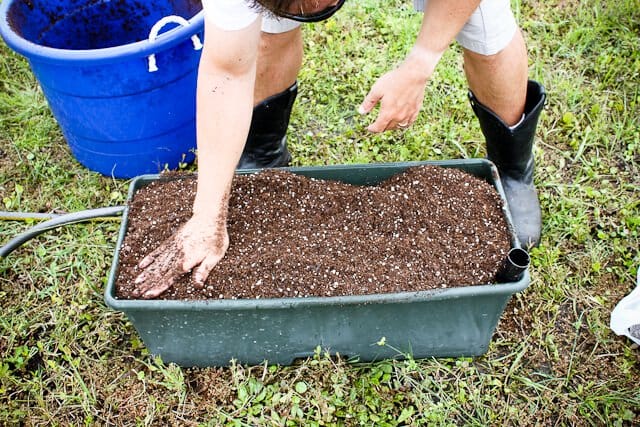
Then add a 2-inch layer of potting mix down by hand, pack down tightly.
Pour in the rest of the wet potting mix.
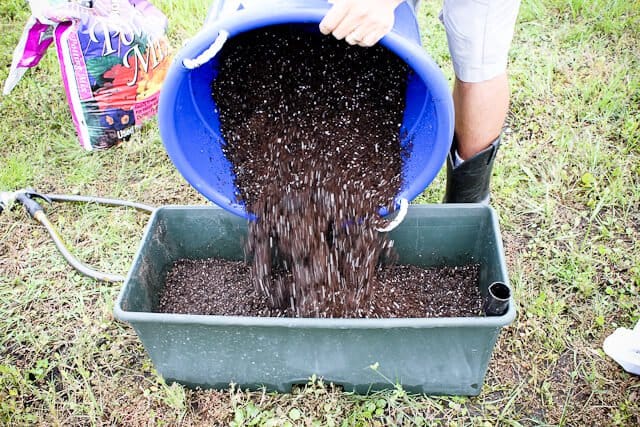
Pack down tight.

Pour the other half of the soil in the bucket.
OPTIONAL: Add dolomite or garden lime, which is used to control the pH level in the soil.
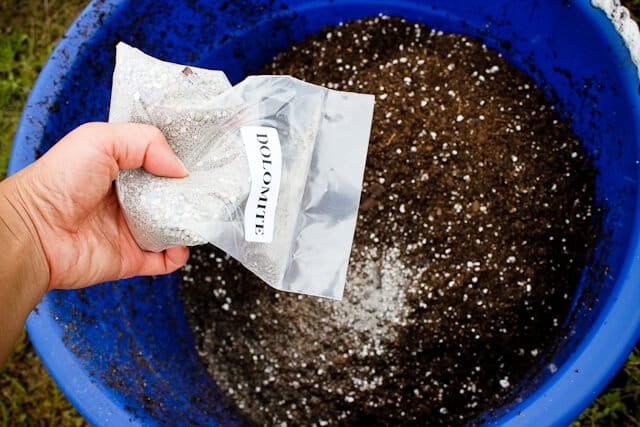
Mix well.

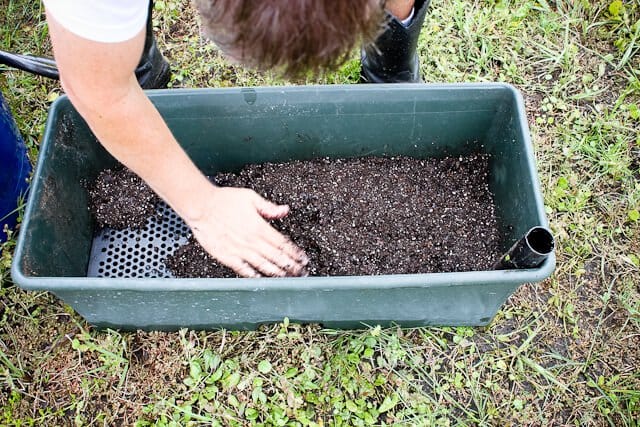
You’ll keep this bucket of potting mix dry, no need to add water in the bucket. Just pour in 1/3 of the potting mix in the bucket.
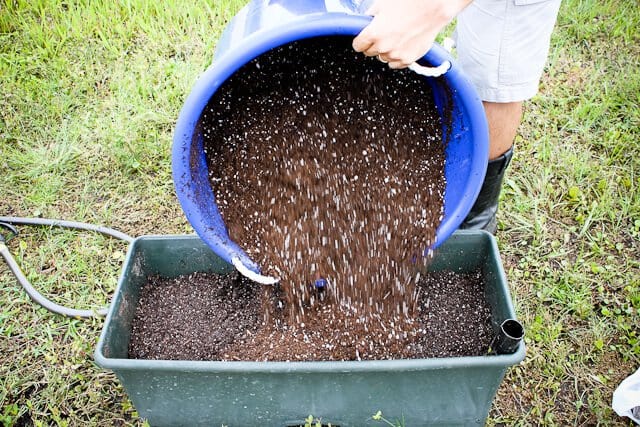
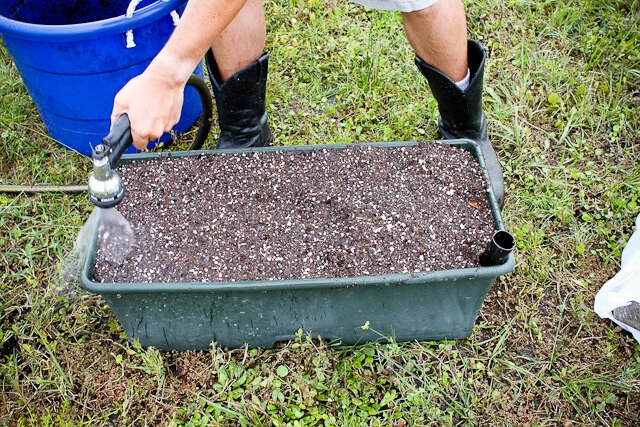
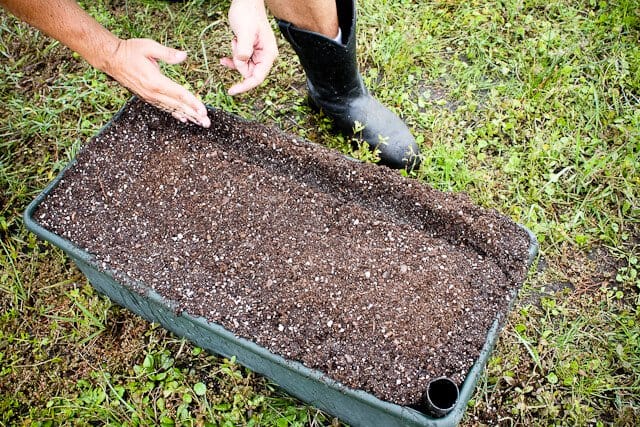
Now pack the potting mix down to make it even and water the soil.
Add the next 1/3 of the bucket.

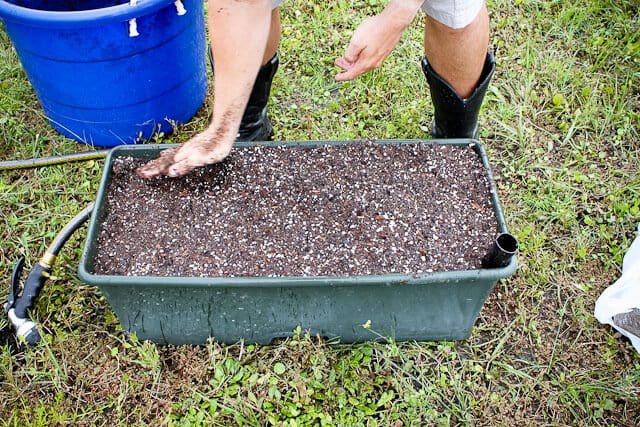
Pat down again to make even.
Water.
Pack down again – you still have more potting mix to add! It will look like you have no room, but keep watering and packing down until you have about 1-inch left to the top.
Add the last of the potting mix.
Water and pack down.

Now we’re ready for the organic fertilizer. Where you put the fertilizer depends on what you plant. Small, leafy greens like lettuce or spinach: you can plant 6-8 to a box and you’ll put the fertiizer in the middle. Large plants like tomatoes and beans, you’ll plant 2 to a box – and you’ll put the fertilizer on one side like below.
Make a ditch with your hand.
Add in the organic fertilizer.

Cover with potting mix.

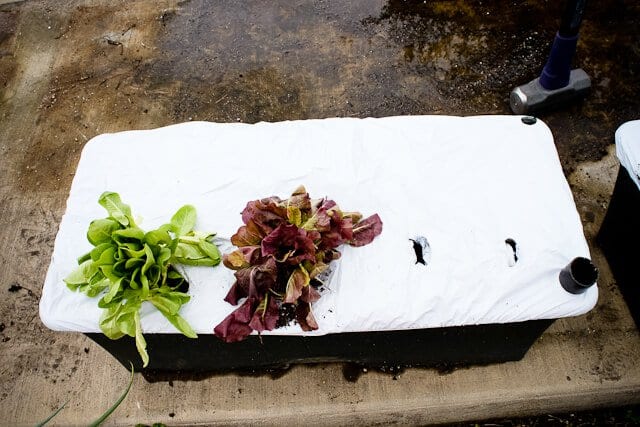
Put the plastic cover on. The white side up is for warmer weather and the black side up is for winter to absorb as much heat as possible from the sun.
It’s like a hat for the box – keeps the water from evaporating, the soil from eroding, keeps nutrients in the box and weeds out!

Poke a hole through the plastic and snuggle in your plant or seedlings. I’ve got 2 lettuce growing on the left and I’ll be adding in some Chinese broccoli (gai lan) on the right.
Here I’ve got 2 bell peppers and a cherry tomato. The fertilizer line runs in the middle.

At this point, I’d like to give a round of applause to my husband, who helped me all weekend with the gardening, even though he doesn’t particularly enjoy gardening nor eating vegetables. 🙂


My DIL lives in Madison, WI and uses them. She has no problems with them surviving the extreme cold.
This is so great! Thanks for the instructions… I will have to bookmark this post for the future, when I actually have a yard to garden in 🙂
Here, though, it is rather expensive to ship in Earthboxes so I really must visit the US at some point to see if I can find some.
I bought my Earthbox this year at a local high-end Gardening Center-Briggs in Plainville, MA. It has only been two weeks since purchasing and planting but I know it will do very well as several friends have had them for years. The good thing about buying the real deal is that the Earthboxes come with wheels on them, making it perfect for the deck and greatly reducing any problems with rabbits, etc.
I live in the frozen north, Canada. Okay it is really not that bad especially where I live.
Here, though, it is rather expensive to ship in Earthboxes so I really must visit the US at some point to see if I can find some.
I’ve made my own but they didn’t work too well… time to try again.
Great post.
Yes! Try again – there are a ton of DIY tutorials for Earthboxes. btw, Scott just posted a DIY hydroponics post – you should check it out – it performs better than the earthboxes.
I am jealous for your big garden 😉 I just have a little balkony at my appartment, but there is luckily still enough space to place 2 eartthboxes. Good work on the step by step instruction and the pictures. earthbox.com is also a good help as well 🙂 good job and beautifull dog 😉
I don’t really think they are expensive – yes, they cost more than most cheaply made planters, but I haven’t had one break. My first 5 must be about 15 years old now.
They were developed by a Florida tomato grower who has used them for (probably) 20 years. They sit out all year in all kinds of weather.
The only forum members who reported breakage also reported doing something stupid that caused it – blow torch, car. . .
They can sit in the hot sun all summer and freeze in the winter and still not get brittle. This food grade plastic has made a believer out of me. As I said in my first comment, ‘regular’ planters bought the same year as EarthBoxes, sitting in the same location, are brittle and falling apart. My EarthBoxes are not.
Is the cover of the boxes a must? Or does it just help when you live in a cold area? I am pretty new in gardening….so sorry if my questions sounds stupid to you 😉
thanks
The covers keep out weeds, keep rain from diluting the fertilizer, and help maintain the proper moisture level inside the EarthBox. If you go to http://www.earthbox.com and follow the link to the Forum, you will get the advice and experience of many EarthBox users from all around the world. Each EarthBox will come with complete instructions, but the Forum is written by users.
I couldn’t love mine more. ;>
We have used the earth boxes for about 5 years and they work great! Even for something with a brown thumb like me.
Thanks for sharing the history of them as this wasnew to me.
My favorite part is your boots. Earthboxes are awesome!
You do NOT use soil. Soil packs down too much. If you can’t get to the EarthBox research center, then look for ‘potting mix’. Something with soil in it will say so. Potting mix is lighter, and will retain moisture without rotting the roots of your plants. When replanting my boxes I usually do what they do at the Research Center – the water that is added has a water soluble food in it to give the plants a good start. And to answer someone else’s question, I water the boxes daily in this hot FL sun. The box will only take as much water as it can hold, and the excess goes out the overflow. You CANNOT over water your boxes.
Question – we started with earth boxes last year and they did EXCELLENT! My question is regarding the soil. I understood that they were designed to use a soiless mix as oppossed to soil. I’m also in FL and will be starting our garden soon and don’t want to be buying soiless mix if I’m supposed to use regular potting soil.
Thanx
You’re absolutely right – it’s potting mix, not soil.
How amazing! I’m just reading this post and watching how they do the earthbox gardening and I’ve enjoy it already how much more if I will do it too. I gonna follow this one.
I love your garden! Do you have any preditors in the area? Besides birds and squirrels? Any plans to fence the area?
You have made such a great planting guide, EarthBox could buy it and use it.
There is a wonderful forum @ earthbox.com Very informative, easily searchable, and nice to newbies. ;> About the only thing we get snotty about is the word ‘soil’ as EarthBoxes use a peat based soil-less potting mix. Regular garden soil is too heavy for a sub irrigation system.
I’m so jealous of your growing seasons. I got even by supplying my son and his family with several EarthBoxes (they live near Orlando) and they have to send me pictures while I wait for spring in the cold rain of the pacific northWET.
EarthBoxes aren’t really expensive. They seem to last forever. I bought 5 many years ago (now I’ve got 30 – they’re addictive)and bought several smaller container pots at the same time. The regular plastic pots are all brittle now and I only move them with extreem care and a prayer or two. My EarthBoxes are just as good as new.
EarthBox is having a sale and free shipping right now. It’s time to make a wish list and get ready for spring. earthbox.com
EarthBox doesn’t pay me to say nice things. I’m just completely sold on the product. I even took a vacation day and went to the Research Center to meet Blake one year.
Happy gardening!
Where’d my question go?
These are amazing! I know what I am going to do next Spring! I don’t think they would work in the winter snow up North here, otherwise I would want to start tomorrow! It is already in the lower 30’s at night now. I am just thrilled about seeing these and wish I had known more about them earlier this year. I thank you for such a comprehensive post on how to use them. Now to make sure I don’t forget where to find this page for next Spring! 😀 Thanks again!
How do you know when to water? Is there a gauge or something so you can see the water level?
This is so great! Thanks for the instructions… I will have to bookmark this post for the future, when I actually have a yard to garden in 🙂
Amazing garden…..wish I could also do the same. I love earth boxes but it does cost a lot and that is what is keeping me from starting an earth box garden.
I love th epost and hope to start one soon. Maybe you will feature an earthbox in your giveaways ;o)
Where do you buy gai lan seeds?
I buy them from Kitazawa, they specialize in Asian veg seeds. http://www.kitazawaseed.com/
I bought 3 of these at a garage sale about a year (without cover) and didn’t really know what they were called or exactly what to do with them. I filled mine with herbs which did great. You have given me a better way to pack them and utilize them. Thanks
I love my earth boxes! I now have ten. The oldest is 6 years old and has been in continual production in the hot FL sun for the entire time. It still looks and feels perfect. I imagine that it will last for many years to come. I also have 5 gallon buckets that have the same water space and soil wick that the earth boxes have. I grow mostly herbs in the buckets and veggies in the boxes. I love having something fresh from the garden all year around. 🙂
We have used the earth boxes for about 5 years and they work great! Even for something with a brown thumb like me.
Thanks for sharing the history of them as this wasnew to me.
How I wish we have this in my country..
I am so jealous. Our gardens here in Ohio are now on the downside of production, so it’s awesome that you are just now planting. I will live vicariously through you guys all winter.
We’ve used earth boxes, very successfully, where we live. It’s just about the only way to garden out here in the Boonies.
I love the EarthBox concept because it is weed-free and it conserves water. The main issue is the startup costs.
How long do the boxes last? I imagine they get brittle and start breaking down with too much sun exposure.
We used to live a couple of houses away from Blake’s daughter. We’ve had earth boxes ever since they became available. Still have the original one that we bought, must be close to twenty years old. Only problem is that the plastic part in the bottom is broken. We now have over 30, it’s an addiction. Only way to garden in Florida!
Go Scott The Gardener! 😀
P.S. I love my earth box! One day when I have a house with lots of room I want a bunch of them like you have. Looks like you are going to have a ton of veggies soon!
This. Is. Amazing. I. Am. Freaking.