Update 12/8/09 I’m thrilled to share that I’m a featured blogger for Oprah’s Holiday 2009 where this recipe is being featured!
***
While I love to make my own pizza or flatbread dough from scratch, sometimes I just don’t feel like getting my hands all messy with dough. I cheat a lot and buy packaged flatbreads from the supermarket and throw them on the grill or under the broiler for a quick pizza. One of my favorite fall recipes is Warm Fig, Apple and Gorgonzola Flatbreads, briefly grilled on our barbeque grill.
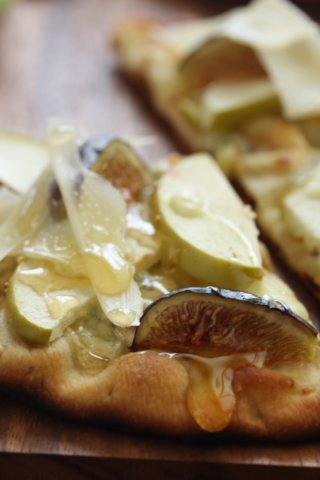
The creamy gorgonzola with specks of blue-black cheese melts, the warmed slices of Granny Smith Apples and wedges of juicy figs cradle the shaved slices of Parmegiano-Reggiano. But we’re not done with it yet, sweet, sensual honey drapes each slice, some oozing over the edge, onto your fingers.
If you’re interested in food photography…I’m showing you photos before I used Photoshop, so that you can see before and after. I shoot in RAW with my Canon 40D and I used the 60mm macro lens to get nice, sharp closeups. I generally use Photoshop to sharpen, lighten the photo and increase the saturation just a bit to make the colors and detail really pop. I know many of you don’t have Photoshop (it’s expensive) but you can do the same in Adobe Photoshop Elements 7 ($99); and even in Flickr they have free online tools to help you lighten and increase saturation of your photos. I know Adobe has a free online editing tool…but can’t find it at the moment…if you find, will you please let me know?
I always try to fiddle with the photo and camera settings to take the perfect shot, which minimizes my use of software to touch up. But sometimes, the lighting is not just right or my white balance is a bit off and I’ll need to adjust. There’s nothing wrong with doing that, every single professional photographer does some sort of touch up, and it’s generally sharpening and color correction.
Here’s my before and after:
I’d love to show you what I do in Photoshop (it does make a big difference in the picture, but since so few of you have this software, I’ll have wait until I buy a copy of Photoshop Elements so that the tutorial is more relevant to more people.

Test shot #1: angle too low, where’s my apple? little too dark, let’s move closer to the light and fiddle with camera settings
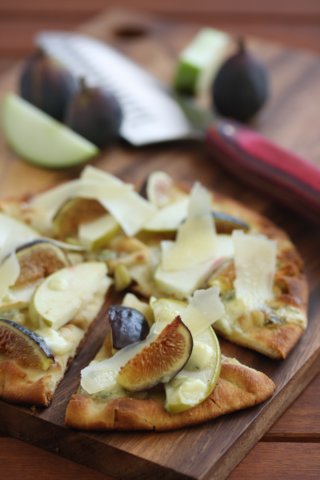
better angle. swiped an apple slice from one of the other slices to tuck under the fig. the background in previous pic was a little empty, so I added some apples and figs next to the knife. Doesn’t this look like a better composed photo? Now that I got the setup, lets get the honey on top.
Nice, but you know what? I think it would look so much more interesting if I made it an action shot. Honey drizzlin’ action shot. Hard part is that I don’t have a remote shutter release for the camera and I’m home alone. So I’ll have to drizzle w/one hand and shoot with the other.

Drizzling honey, TAKE ONE!
Oops too early. But I have my camera set to take lots of photos really fast. Let’s see what the next frame is.

Drizzling honey, TAKE TWO!
Problem is that my camera is focusing on the HONEY…and the honey is liquid, so now the shot looks out of focus. Need to adjust focus. This might be too difficult to do by myself. If I had one of my kids here, I’d pay them 25 cents to hold the spoon for me.
Even if I left the photo like this, it’s still a damn fine photo. But let’s try again. Wipe off honey and….

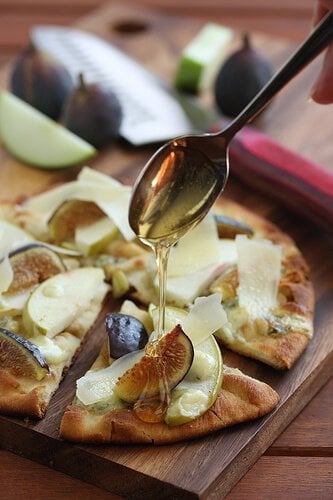
Drizzle honey, TAKE 42!
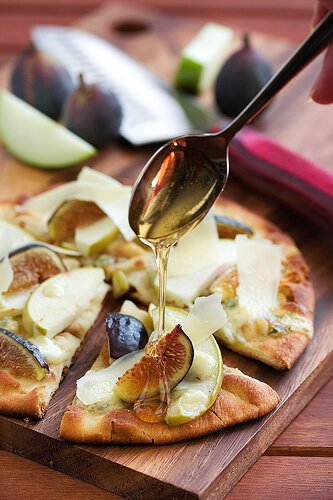
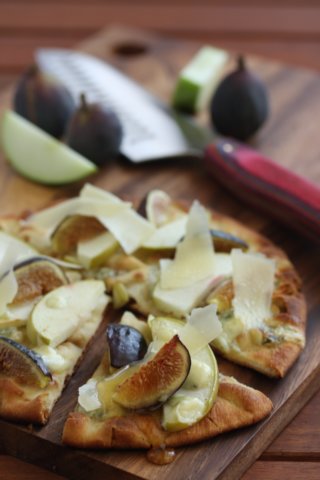
Bingo! Got the shot that I want. Look at that honey action! This is all pre-Photoshop, and the next frame is my final.

In Photoshop, I sharpened (Unsharpen Mask) and brightened up the shot just a tiny bit. If you go back to the previous shot, you’ll notice a big difference of how the colors just pop and become more vibrant.
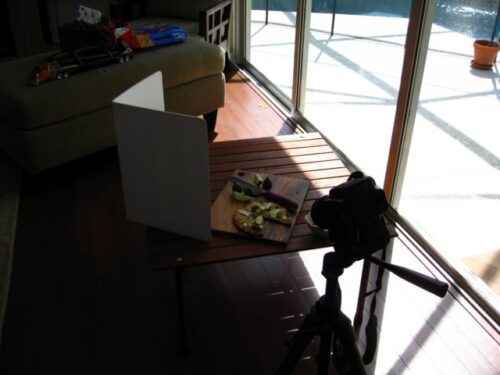
And here was my lighting situation. The light was really harsh that late afternoon, so I kept the food out of the direct light to avoid harsh shadows. The whiteboard helped bounce the light back onto the food.
Oh yes, please enjoy the recipe for Warm Fig, Apple and Gorgonzola Flatbread
***

Warm Fig, Apple and Gorgonzola Flatbread Recipe
2 tablespoons olive oil
4 8-inch round flatbreads
4 ounces crumbled gorgonzola cheese
1 apple, cored and sliced very thinly
8 ripe figs, cut into 6 wedges each
2 ounces parmesan cheese (Parmegiano-Reggiano), shaved with vegetable peeler
2 tablespoons honey
Preheat your grill, half direct heat. Brush olive oil on top of each flatbread, especially the edges. Assemble flatbreads with gorgonzola, apples and figs.
Grill flatbreads over direct heat for 3 minutes, until the bottoms are toasted and browned. Then move to indirect heat and close cover for 3 minutes to finish melting the cheese and warming the fruit.
If broiling, set your rack to upper 1/3 position. Grill flatbreads without the toppings for 2 minutes to just get them nice and toasty. Then layer on the olive oil, gorgonzola, apples and figs and return to oven for 4 to 6 minutes until cheese has melted and fruit is warmed through.
Sprinkle shaved Parmegiano-Reggiano and drizzle honey on top.
Serves 4 to 6 as appetizer or dessert.