
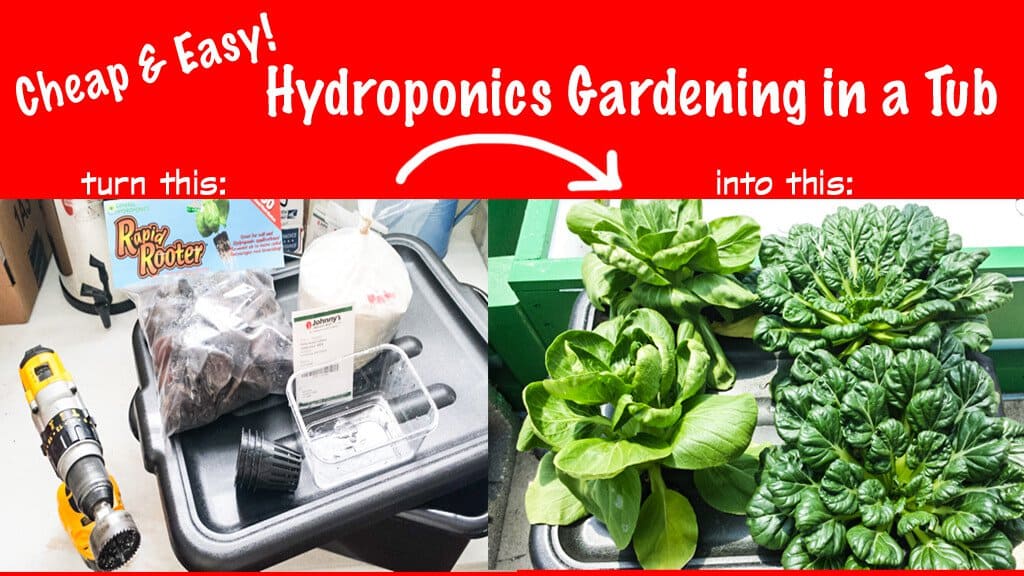
If you think hydroponic gardening is difficult or expensive – you’re wrong! A simple tub (or even a milk jug) and a handful of easy-to-find (and cheap) products and you can hack yourself a hydroponics garden.
I wanted to title this post “The Easiest Hydroponics Ever” or “Set It and Forget It Method” or “No Excuses Growing Method”. But Tub Hydroponics seems to be the most accurate name for it.
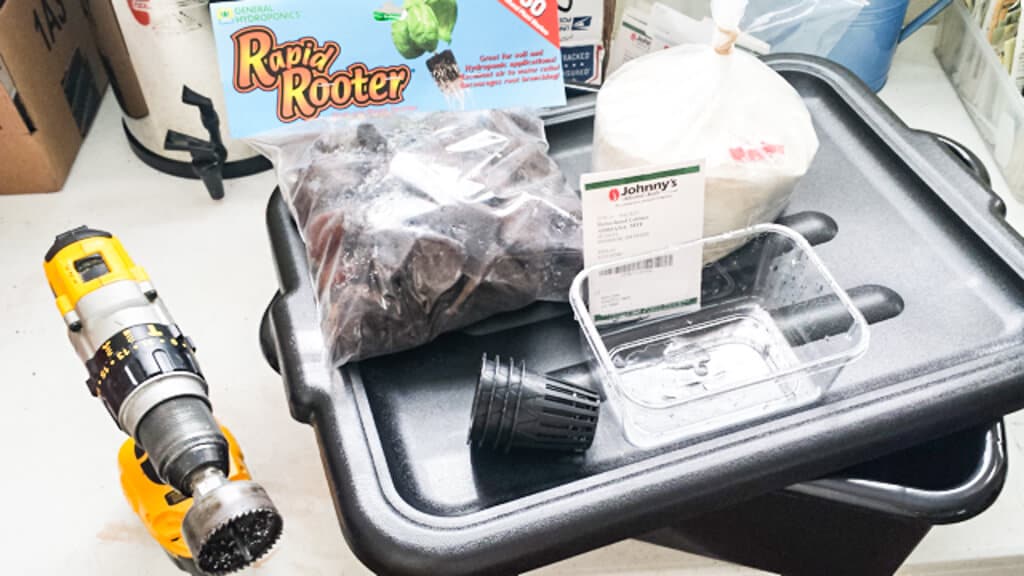
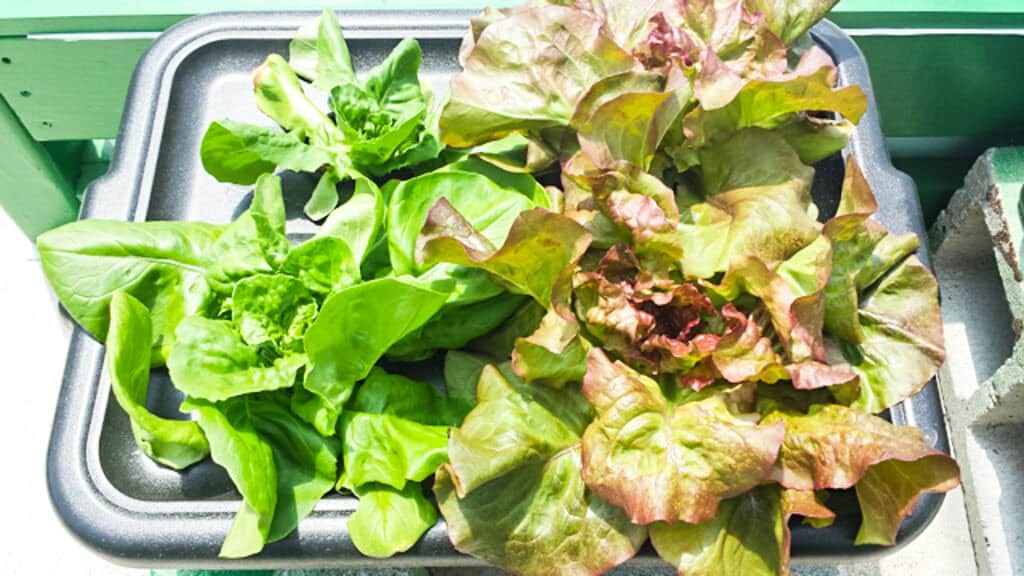
Basically we are going to show you how to turn this collection of things:
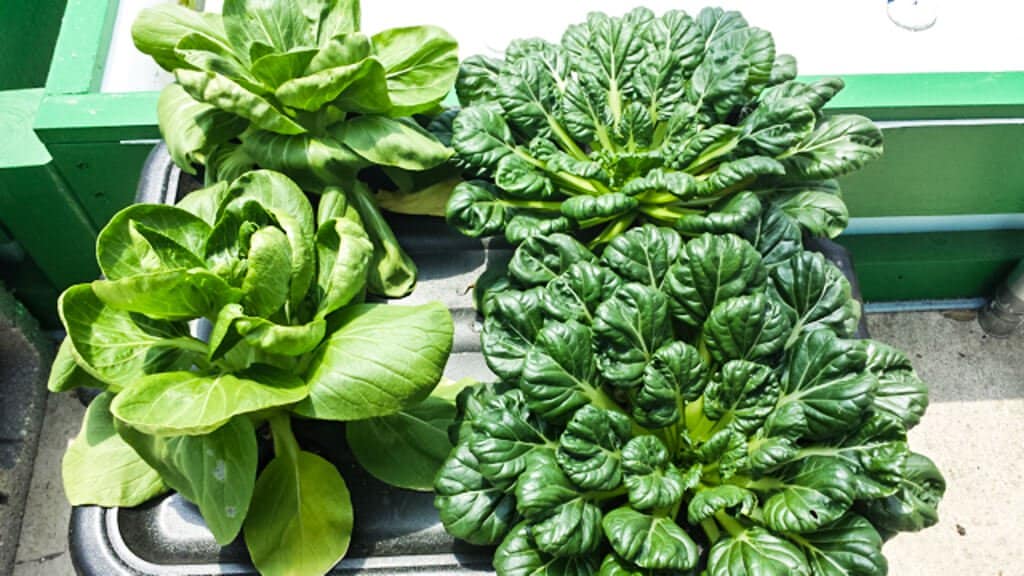
into these fabulous looking leafy vegetables.
Anyone who knows me well, understands I really enjoy Aquaponics. I love how everything works together forming a complete cycle. I feed the fish, the fish provide nutrients for the bacteria which convert it into food for the plants which in turn provide me with food. When functioning correctly it is truly a beautiful thing. Aquaponics is a very big and complex subject. So big that I didn’t want our first real grow something post diving into the depths of Aquaponics. I had to find something simpler.
Well, if we remove the fish and bacteria from the system we are left with Hydroponics. I provide nutrients in a circulating water system which feeds the plants and the plants feed me. Normally when growing things hydroponically we need to have big discussion around reservoirs, water pumps, air pumps and nutrient solution. And, oh yeah, lighting, salt build up, pH adjustments, constant monitoring, nutrient solution additions and replacements and so on and so on. It’s a discussion that quickly boggles the mind, causing it to shutdown and go huddle in the corner like a stressed out parakeet. Same thing happens when I talk to my kids about cleaning their room, but I digress.
Still too complex. There’s got to be a way to make it easier, simpler. Think man think! How about removing the pumps and just make it plants, water and nutrients. Time for some Google research! Bingo! Found a link to “Three Non-Circulating Hydroponic Methods for Growing Lettuce” by B.A. Kratky from the University of Hawaii.
The basic premise is very simple. Fill a container full of nutrient rich water and cover with a lid. Place a lettuce seedling in a special pot called a net pot and place it in a hole in the lid such that the bottom of the pot is touching the water. The seedling gets water from the container, likes what it tastes and sends out more roots to get more of that nutrient rich water. The plant continues to grow, sends out more roots and consumes more water. A moist air gap is created between the surface of the water and the bottom of the net cup. In this gap the plant sends out smaller horizontal roots to absorb oxygen. Kratky refers to these roots as “oxygen roots”. If you were to fill the air gap with water it would drown the plant.
So what does all that mean to us? It means simple, easy, set it and forget it lettuce in a tub. Or what I like to call Tub Hydroponics.
Let’s get started.
First gather your materials:
- 1 – 7 gallon tube with lid
- 4 – 2 inch net pots
- Rapid Rooter grow plugs
- Some lettuce seeds
- Hydroponic fertilizer
- A small plastic tray
- A 2 inch hole saw
- And some water
A note about tubs: Not all tubs are created equally. See this tub I bought from a local home improvement store.

It has a nice locking lid with blue handles. Perfect size, not to pricey. All looked good till I got home and looked at the locking handles a little closer. I realized they drilled holes through the side of the tub to secure the handles. When I compared the net cup to where the holes were, it became apparent when filled with water up to the holes, the bottom of the net cup would not be in water.

I therefore recommend simple restaurant bus tubs with lids. They are perfect for this application. I bought mine from the Food Service Warehouse for a little over $9 for tub and lid. Also tubs that are too deep will not be able to maintain their shape when adding larger amounts of water. Look for the ones that are approximately 7 inches tall. Avoid clear tubs as they will allow too much light into the reservoir which will lead to algae growth. Algae Growth = Bad News.
So let’s get on with it!
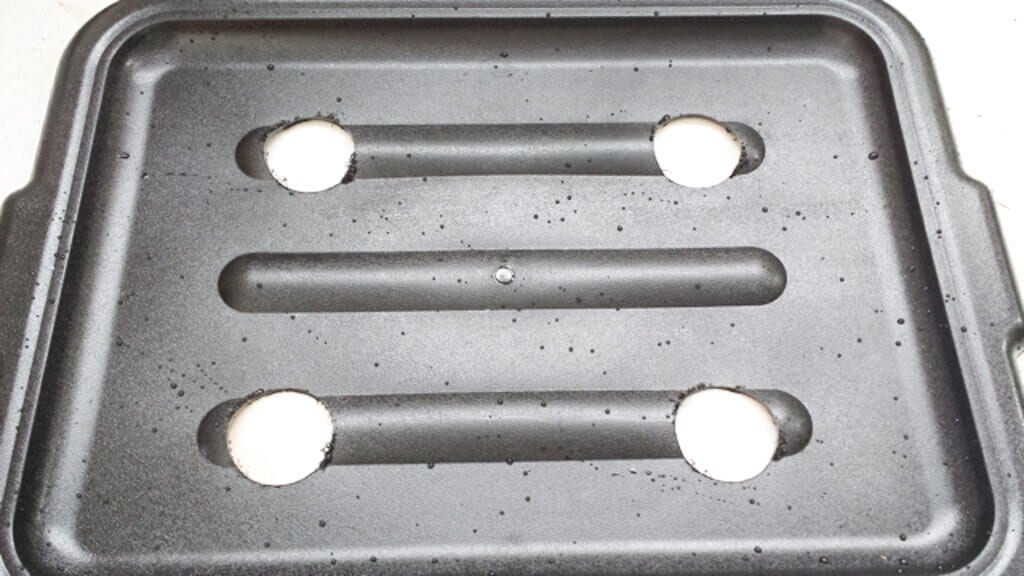
Step 1 – Prepare Your Tubs
Take your 2 inch hole saw and cut four evenly spaced holes in your lid.
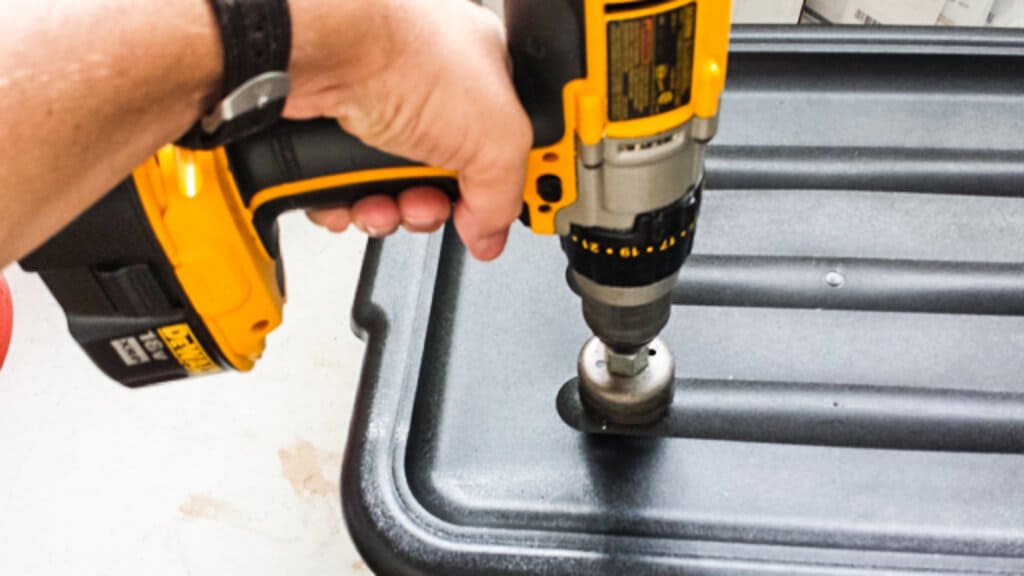
I used the ribs on the lid as a guide.
Take a utility knife to remove the little bits of plastic left by the hole saw.
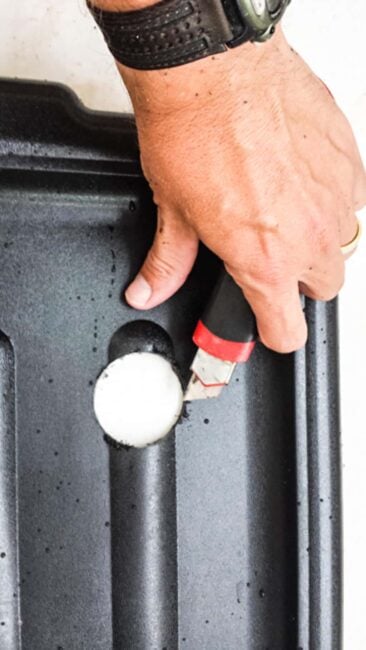
Set you lid and tub aside for now. Also sneak that hole saw back before someone notices it’s missing and you didn’t ask permission to use it.
Step 2 – Plant Your Seeds
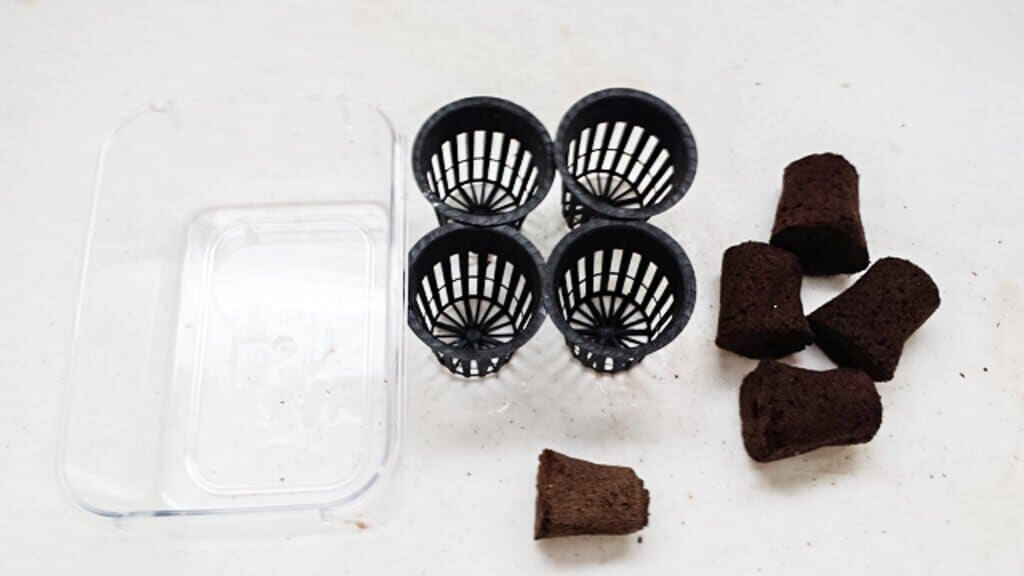
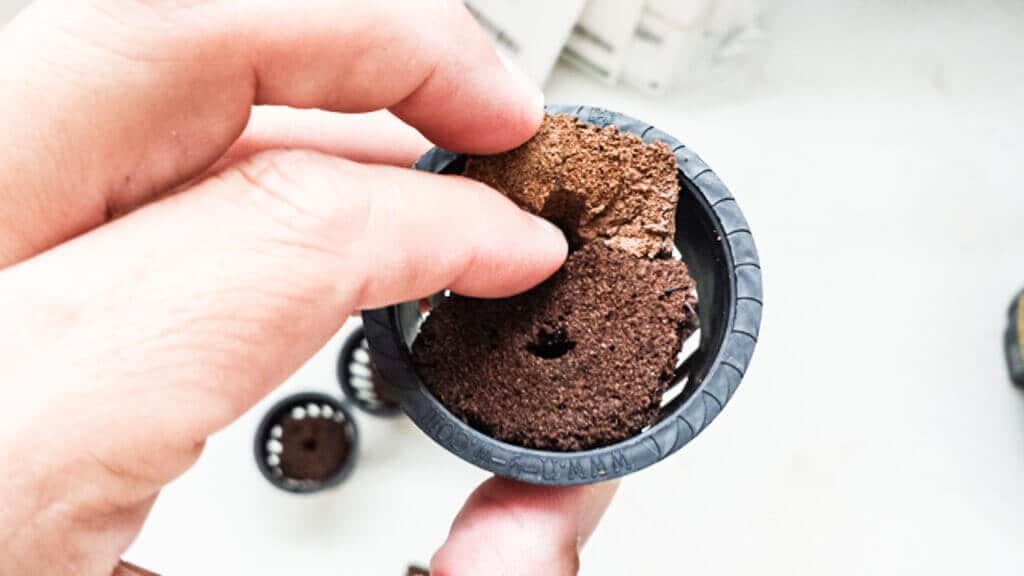
Take four moist Rapid Rooter plugs and place them in your four net cups. If the Rapid Rooter plugs are not moist you can soak them in some water for a minute or two.
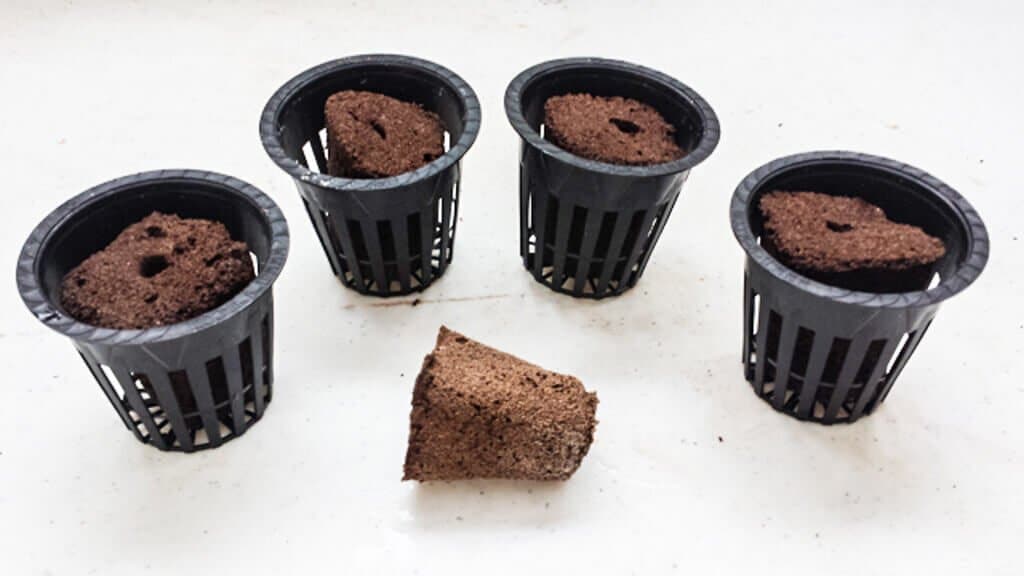
Take a fifth plug (I used an old dry one) and break it into four pieces. Slide one piece in each cup to hold the full plug steady.
Place two leafy greens seeds in each of the full rapid rooter plug holes. If the hole is not open, you can open it with a tip of a pencil.
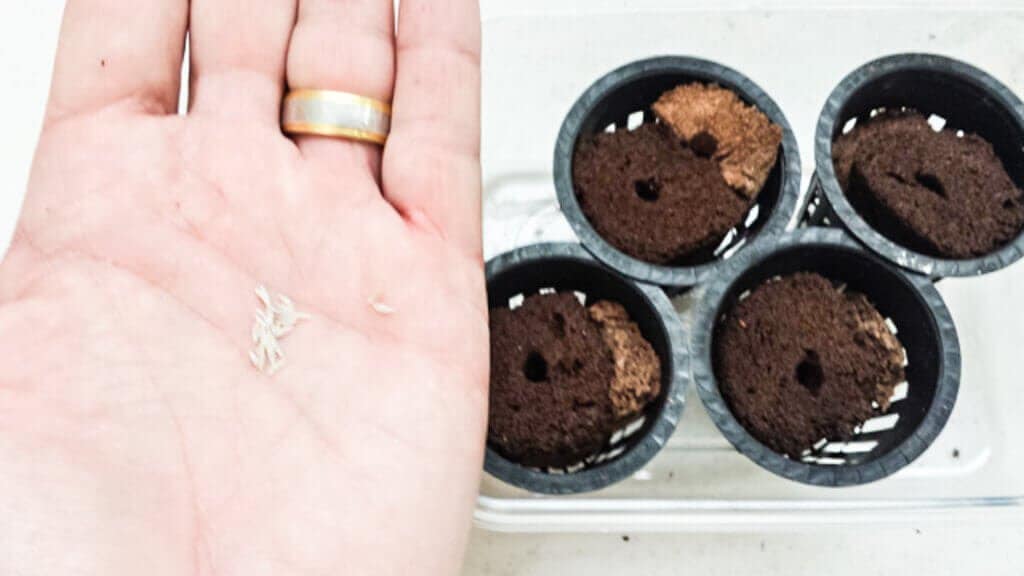
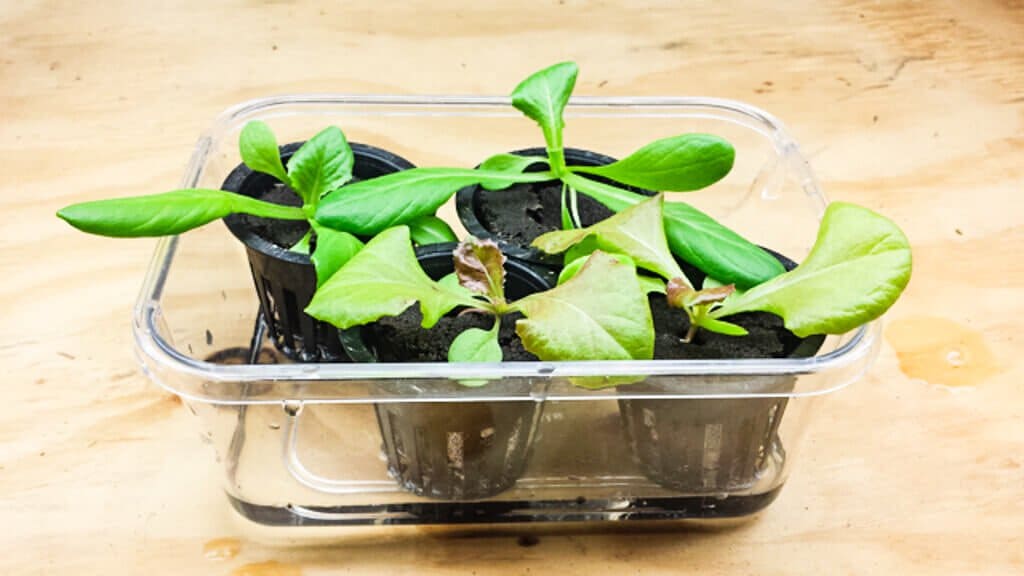
Place your four net cups in a shallow tray and fill the tray with a quarter inch of water.

Cover your tray with a thick dish cloth and put it in a dark place till the seeds sprout.
After two to three days, move your seedlings into the light and refill water to the quarter inch mark.
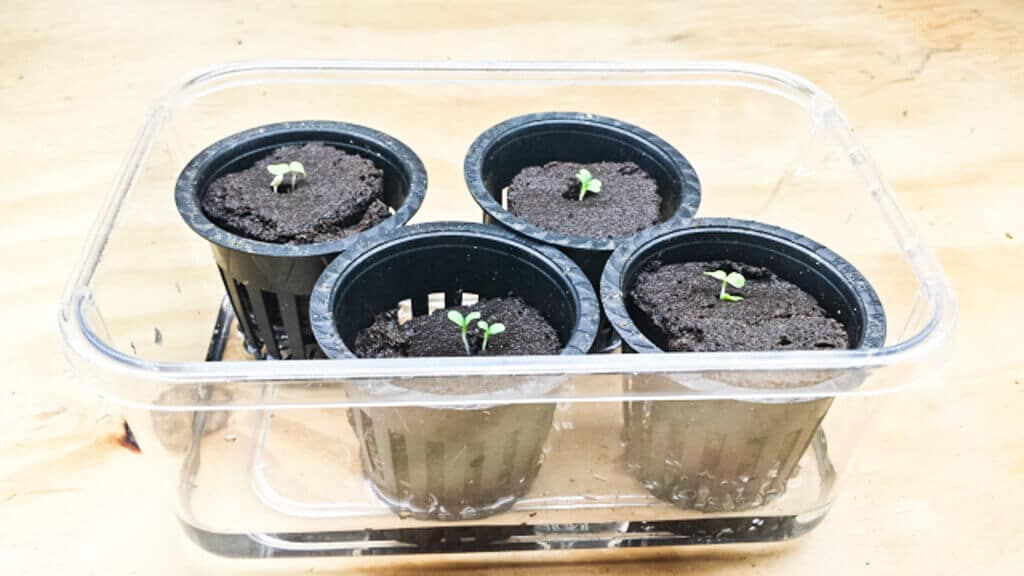
On the seventh or eighth day remove one of the seedlings by pinching or cutting it off so each net pot has a single plant in it.
By the end of 2 weeks your baby plants should look like this.
Step 3 – Fill Your Tub
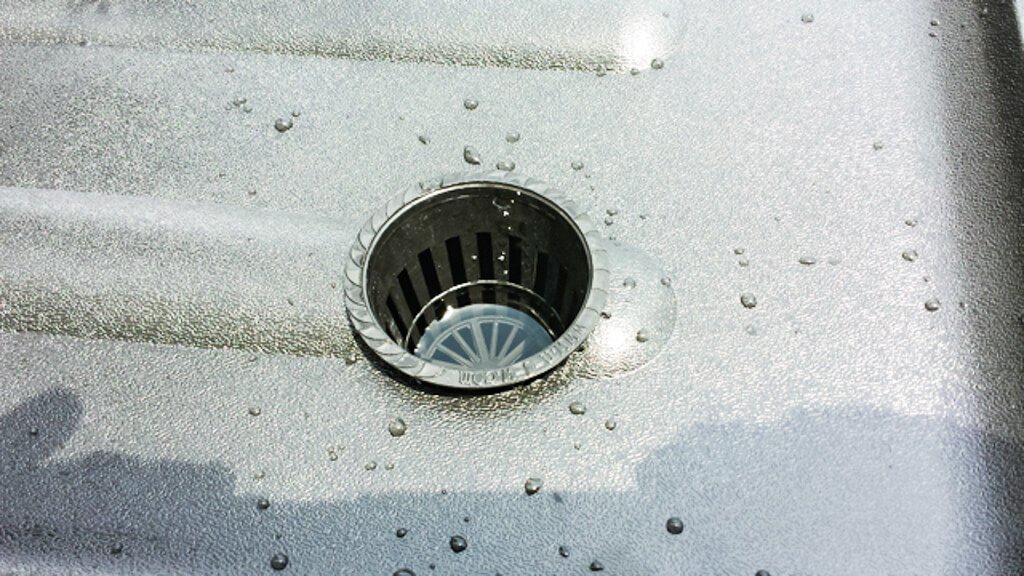
Take an empty net cup and place it in one of the holes in your lid. Put your lid on the tub and fill the tub with water till a quarter of an inch of water is visible in the bottom of the cup.
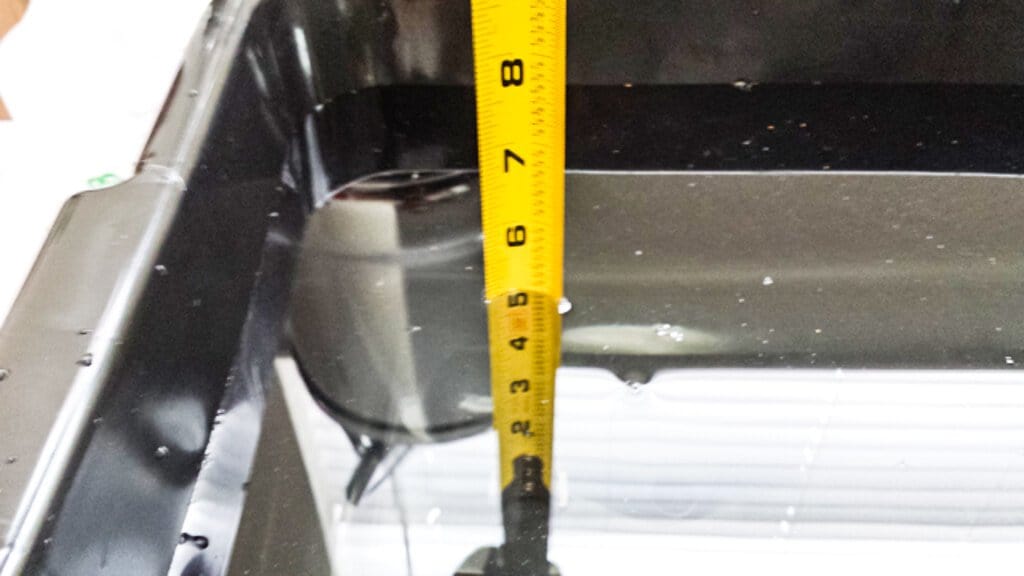
If you are using a tub other than a 7 gallon tub, you will need to determine how much water you have in the container. A 7 gallon tube will be hold approximately 5 gallons of water when filled to the appropriate level. To determine the water volume take the lid off and measure the approximate width, height and depth of the water.
*** Warning Math Ahead ***
Multiply all three measurements together.
Ours was 18″ long, 14″ wide and 5″ deep.
18 x 14 x 5 = 1260 cubic inches
Convert to cubic feet by dividing by 1728.
1260 cubic inches / 1728 = 0.729 cubic feet
One cubic foot holds 7.48 gallons of water, so multiply by 7.48.
0.729 cubic feet x 7.48 = 5.4 gallons
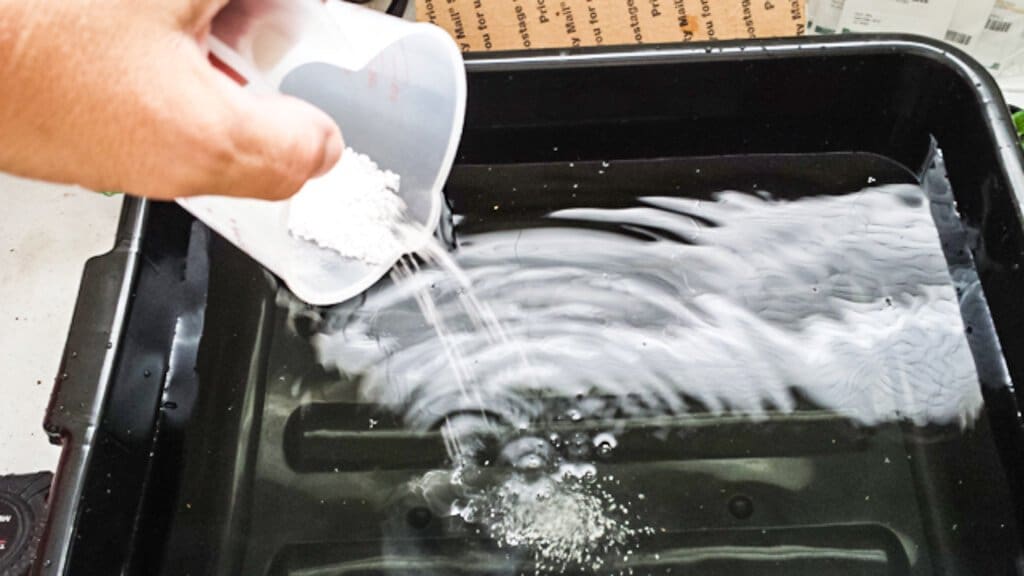
Step 4 – Add Nutrients to Water
Next you will need to add the Nutrients to the water. I am using a mixture of a Tomato Master Blend, Calcium Nitrate, and Magnesium Sulfate (aka Epson Salt) in the following ratios:
- 2 grams of Master Blend per gallon of water
- 2 grams of Calcium Nitrate per gallon of water
- 1 gram of Magnesium Sulfate per gallon of water
You can check out MHPgardener’s video explaining the ratios. He has had great success using this mixture.
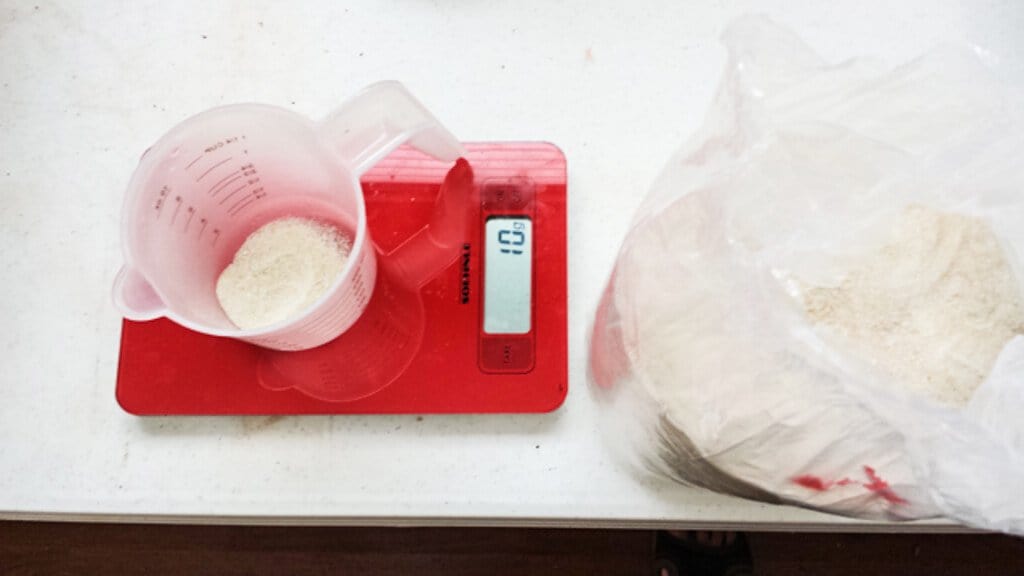
Pour nutrients into the tub and mix with your hand. It will take some time to dissolve. It is ok if a little settles on the bottom.
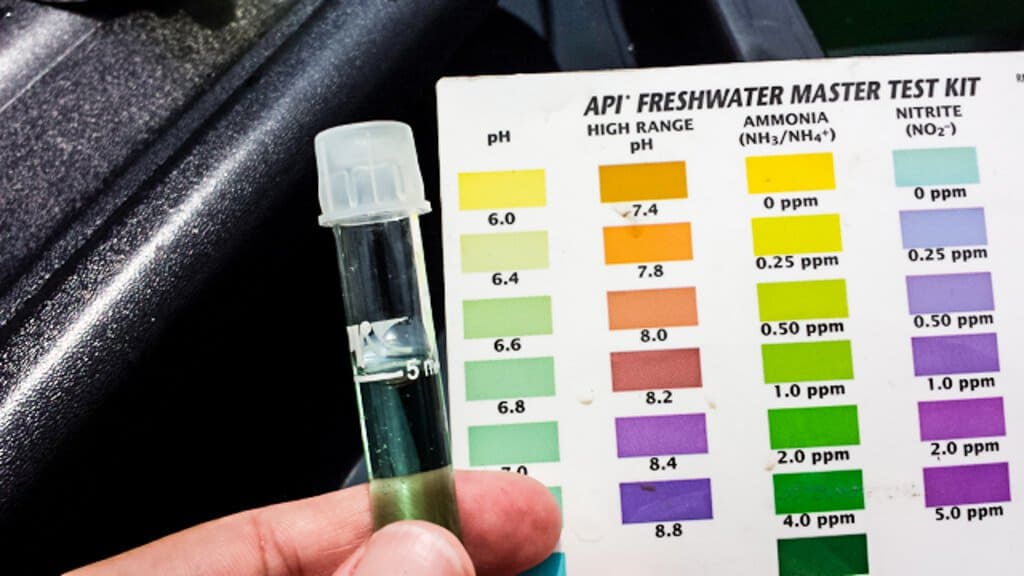
Step 5 – Check pH of Water
Use a pH testing kit to check the pH of your water and nutrient solution. The ideal range will be between 6.4 and 6.7. If you use rain water, typically adding the nutrients will result in a pH in the ideal range. If the pH of the water is high, you can add a few drops of lemon juice, mix and retest again. Or you can use a hydroponic pH lowering solution. The good news is, once you test your water and determine what is needed to adjust it to the ideal range, you will not need to retest in the future. Just add the same amounts of pH adjusters.
Step 6 – Insert Seedlings
Place the lid back on the tub and drop the seedling filled net cups into the holes we made in Step 1.

Step 7 – Wait
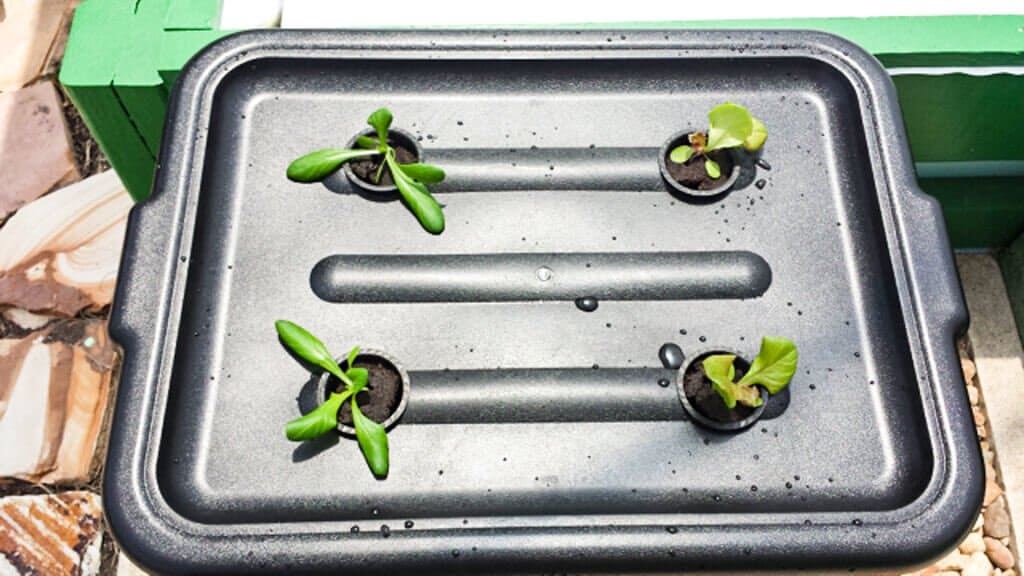
Place your tube where there is a good deal of light. I recommend natural sunlight, but they can be grown under full spectrum fluorescent tube lights (6500K). And then wait. Leave it alone. Don’t touch it. Don’t add any water. Just let them grow.
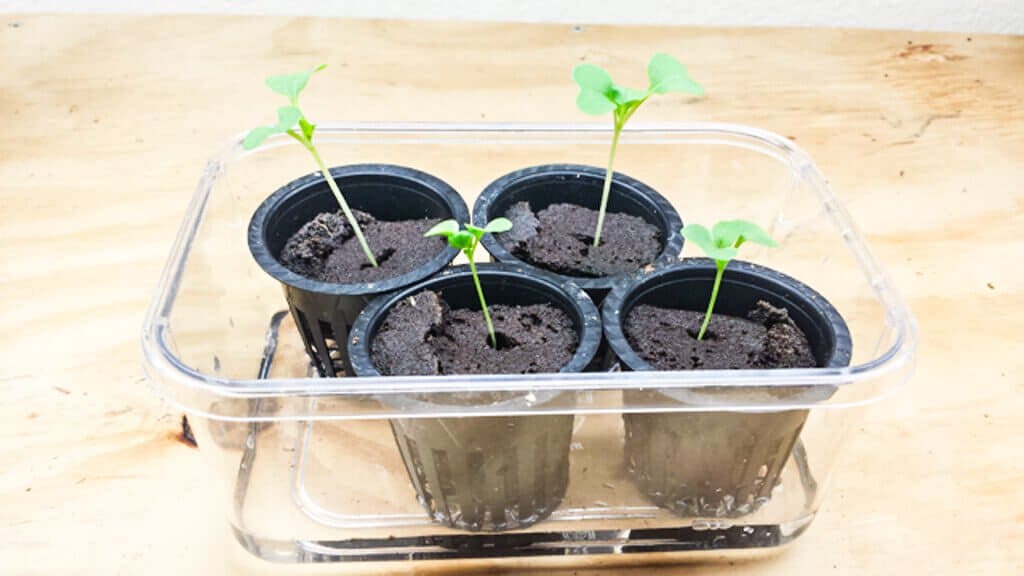
This is the first day in the sun for these guys.
By the beginning of the second week you should see some substantial growth.
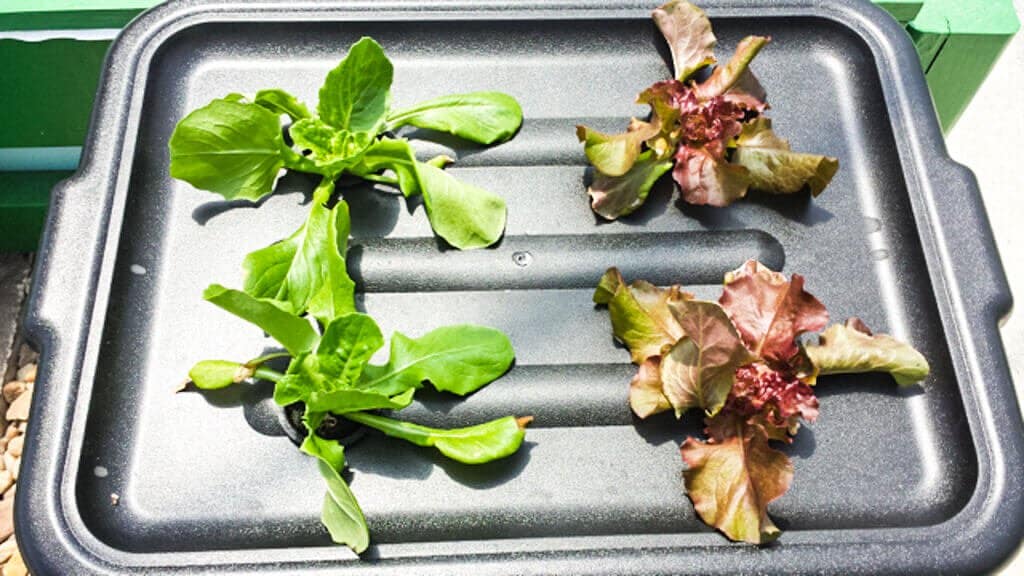
Beginning of week three. Going strong!
Beginning of week four. Almost ready to harvest.
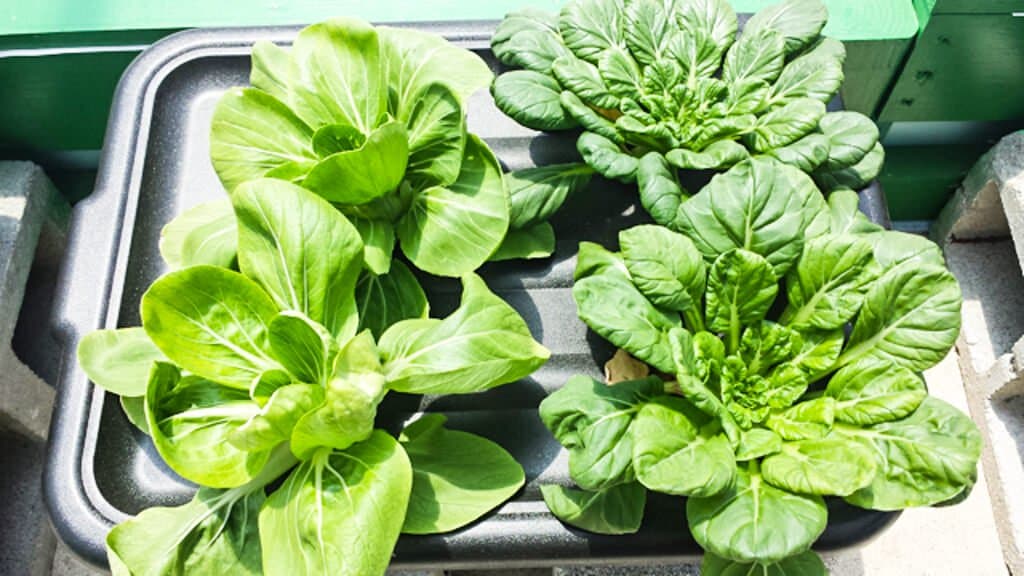
Beginning of week five and these Bok Choy and Tat Choy are ready for harvest.
Here are the roots at 5 weeks. Notice how low the nutrient solution is. Look at the healthy, strong root system. The health of the plant can be determined by the size of the root system.

If you are growing in an area that has light only from one side, you may rotate your tub every few days to encourage even growth. I haven’t had to do this yet.
Step 8 – Harvest and Eat!
Enjoy the fruits of your hands-off tub hydroponics.
Milk Jug Hydroponics
You can even do this in a recycled milk jug! I would stick with a lettuce variety on this method. Things like Bok Choy and Tat Choy are big water consumers.
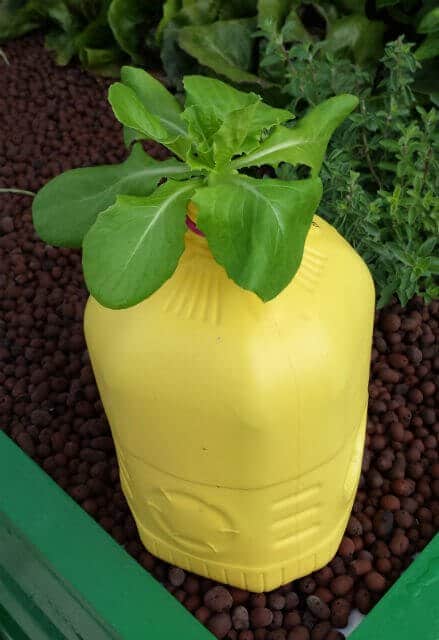
The changes I made here was the elimination of the net cup. Instead I stuck a toothpick through the very top of the Rapid Rooter plug to hold it in the open top of the gallon jug. I filled the jug to an inch below the top and added enough nutrients for one gallon of water. Capped the jug and shook the jug to mix. Removed the cap and insert the plug in the open lid. Make sure the plug reaches the water level initially. You only need about a quarter of an inch in the water. The let it sit for four to five weeks.
Tub Hydroponics Shopping List
Bus Tub
This is the same bus tub I used except it is in white. I think the lighter color would be better for hot sunny climates were over heating can become an issue. Black tubs may work better in cooler climates and indoors where heat absorption would be desireable. The walls on this tub are thick and don’t bulge when filled with water.
Tub Lid
The lid for the tub. You could mix and match color’s if you wish. I just choose to keep them all the same color. This lid for the bus tub is solid. It’s designed to stack other bus tubs full of stuff on top. Definitely will hold up the plants without sagging.
Net Cups
These are 2 inch net cups. They should have ample space to allow the roots to grow down through the netting of the cup. I avoid ones with solid bottoms. Also ensure the net cups have a small lip on the top. I ran across a few that did not have a lip and would slip through the hole cut by the hole saw. You can also source these from a local hydroponics store if there is one in your area.
Rapid Rooters
These plugs make seeding simple and easy, but by no means are they required. You may start your seeds any way you wish. Just make sure you have some sort of media that will allow capillary action to water the plants. Rock wool cubes will work well too, but require an extra step of dipping in a low pH solution for 10 seconds or so. If you start your seeds in soil, you will need to wash the soil off the plant’s roots and transfer to a different media for capillary action.
Seeds
I have linked to some Red Cross Butterhead Lettuce, but you may use any leafy green seed in this system. Adriana and Red Cross are two of our favorites. I suggest some trying all sorts of varieties. Keep in mind what the weather will be like 4-6 weeks from planting your seeds. Some varieties are more heat tolerant while others thrive in cooler temperatures.
Hydroponic Fertilizer
This is similar to the Master Blend Tomato Mix I use. It has the same N-P-K ratio and the same mixing instructions. This formula also contains a fair number of trace minerals for plant growth. With the addition of the Calcium Nitrate and Magnesium Sulfate growth resulting from this mix is incredible.
pH Adjusting Kit
Simple but easy Hydroponics pH adjusting kit. It includes a testing solution as well as pH raising and lowering solutions. Getting the pH into the 6.4 – 6.7 range really helps the plant growth. You can also purchase a water testing kit from a pet store to check your pH. Remember though, we are looking for the ideal range after the addition of your plant nutrients.


I have several herbs started in 64 oz mason jars that are doing very well. I use a grow light, bubbler, ph monitor and the necessary nutrients. I covered the bottom part of the window in my laundry room with insulation that has tin foil on one side so my plants not only get the light they need from the grow light but warmth from the insulation. Have had a few issues with bugs but did my research and attacked the problem with yellow stickers in each plant and neem oil. I’m getting ready to transfer some of them to a tote and have found your site very useful, thank you. This is quite the hobby. Loving every minute of it.
That’s one hell of expensive lettuce!
In the long term it should work out as cents per plant. So you should recoup the costs over time.
Nice presentation. I would only add that I do not think that the ph suggestion of 6.4 to 6.7 is accurate. A ph of 5.5 to 6.0 is probably better. I’m not sure how crucial a point this is but you will see that suggestion in many hydroponics sites as it relates to crops such as lettuce.
This is absolutely fascinating. I run a school kitchen. I would love to integrate some hydroponics for the kids to connect to their food. Can I do this indoors with grow lights? Do you have any ideas for pest maintenance? Do I need to be concerned about cleanliness or pests being attracted to this system? I would love some assistance. Thank you!!!
You can absolutely run hydroponic and aquaponic systems indoors. They are actually easier to manage indoors as you can control most of the environmental factors. Downside is the possibility of loss due to power outages. I am not familiar with the regulations of running a kitchen for public consumption, you may need to use caution when running aquaponics systems near kitchen facilities due to “waste water” issues. Most pest issues that occur indoors are from bacteria infections. Important to keep cleanliness of area and garden tenders.
good day! can you give me some methodology in planting of cherry tomato under hydroponic technique?
There is an alternate way of building a deep water culture system. All that is required is an 18 gallon storage tote with a SNAP TIGHT lid, NOT the kind you used in your article, an air pump( for aquariums 20 gal or higher), net pots of your choosing,(3″ or 4″) are the prefered choice, an air stone of decent size, I am using a 12″ long bar type, nutrients, water and PH up and PH down. An LED grow light is optional depending on the location of the system. The Kratky THEORY of the plants drowning is greatly flawed! HOW?? It is impossible to completely submerge the plants do to the fact that there is an air gap at the top of the container, only the bottom 1/2 to 1/4 of the pot is in the water. The upper portion of the plant is open to oxygen, not to mention the air pump and the air stone. A really good DIY video on this type of system is from Scott’s Place on YOUTUBE. I recommend getting a tub that is red, black or gray so you don’t have to paint it. The paint fumes could possibly contaminate the water. Also use black or dark green air hose.
You don’t need clay pellets/rocks for this system?
No, the roots are suspended in the nutrient solution. The cubes we started the seeds in sometimes needed a little stabilization in the net-cup. When that happened, I would slip a clay pellet along the side to hold it in place.
I have tried this method several times and each time after a couple of weeks, the roots get covered in pink bacteria and the plants droop and die. I have tried bleaching the tub and net pots prior to use, but still happens.
How can I avoid this?
Bacteria and Algae growth are two of the biggest challenges in hydroponics. Anywhere there is a nutrient rich water solution and light there will be algae growth which in turn attracts gnats and small black fly larvae which will destroy young plant roots. Your best defense is the elimination of light on the nutrient solution. That’s the first line of defense. The second is to look into certain grape seed extracts added to your nutrient solution. This will help prevent algae growth. Be careful on dose size. Too much could be problematic to young plant roots. Check out this link to see a dosage chart: http://healyourselfathome.com/HOW/THERAPIES/GSE/GSE_uses_horticultural.aspx. Notice we are talking about drops / gallon of water in a hydroponic solution. Very little is needed of a good quality GSE.
Very cool DIY project. Thanks for sharing and linking to Amazon for a place to buy each part.
Is circulating water needed? How often do you change or refresh the water?
Circulating water is not required in this application, and most of the time the addition, changing or refreshing the water is not necessary. In theory the decreasing water level is what allows the “air” roots to develop near base of the plant above the water line. During the hot summer months, when the plants are transpiring more and we were loosing large amounts of water to evaporation, we would occasionally add more water to these tubs. Whenever adding water, only add enough cover 50% of the exposed roots, otherwise the plant will suffer. If standing water is an issue, you can add a small air stone and air pump. The added air is not necessary for the plant growth, but it will help keep the water moving.
This is an absolutely WONDERFUL tutorial–precise and easy. Thank you SO much for putting it up for all of us to use!
Wow!! I’ve been interested in trying to grow my own hydroponic lettuce, thanks for the instructions. Do you use an air stone for this system? Also, how often do you change the water out?
I want to grow basil, rosemary, oregano and thyme. Would you suggest that Earthbox system? We have a lot of forest critters that like to interfere with growing things.
Hi Jane – yes, Earthboxes are amazing for any herbs or leafy greens. In one box, I’ll have all my herbs – I don’t mind that they are planted close together, because I use them so often. I also plant rosemary too. Be careful of mint – it’s a “creeper” and unattended, will take over the entire box and suffocate the other plants. If you plant mint in the same box, just keep it trimmed and keep a watch for the roots.
In another Earthbox, I’ll plant a variety of leaf lettuce (not head lettuce). Leaf lettuce allows you to pick your lettuce leaf by leaf, instead of waiting to harvest 1 head. I’ll plant 8 leaf lettuces in 1 box.
Love this! Going to try it, thanks! I have some questions – the area on my deck I’d like to use gets a lot of direct sunlight for 70% of the day, and it gets HOT out there in the summertime (I live in the midatlantic…. “hazy hot and humid”!) My herbs wilt every afternoon and then perk up again in the evening when the temps cool… I was considering putting up a bit of shade for them this summer to keep them from looking so sad every afternoon. Would this lettuce also wilt in such hot direct sunlight? Should I also put some shade over the tub?
Secondly, I was worried about the water in the tub turning funky (ie smelly) after weeks of being stagnant and filled with nutrients. Does this not happen, or do you add something to the water to prevent that?
Love your blog <3
Jeanne,
I would highly recommend putting some shade cloth over the tub. I would recommend somewhere around 50% shade cloth. Make sure there is plenty of room for air movement between the cloth and the plants. If it gets crazy hot, the lettuce will wilt in the sun. Even heat tolerant varieties will suffer a little. A couple of things to keep an eye on. When we run it here in the summer, we tend to loose more water quicker than we anticipated. Check the water level occasionally. We usually add about 1/2 to 1 gallon of water during the third week or so. Raise the water level part way up the roots but do not completely submerge them as this could drown the plant.
Use a white tub instead of a black tub. The black tub absorbs too much heat. Good for cool weather gardening, but not the hot summers. You can also switch from lettuce to another leafy green that does a little better in the heat. Some Bok Choi and Pak Choi seem to do well here in Florida. Make sure you have a lid that will help sunlight off the water. This will help prevent or at least slow algae from growing in the water. We haven’t had much of an issue with the water getting yucky in the short growing time.
Thanks Scott! Have a great weekend!
What about organic solutions? Or a beta fish?
hello which kind of vegetable can use for this method ???
What works best are your leafy green type vegetables. I have seen some success with asian greens as well.
How do you keep rain from getting in and diluting and filling up the container? This is something I can not find anywhere addressed.
Grow it under cover?
Thanks for this information. Can you tell me where you buy the calcium nitrate? A garden center? Thanks!
I admit I have not read the entire post — yet — so perhaps you have addressed this. But my question: What about herbs (the culinary kind, not the recreational kind). Some of those photos remind me of basil. I love to cook with fresh herbs, but they are outrageously expensive here in the Midwest. Being able to maintain a steady supply on my own would be fantastic. I’m thinking basil, oregano and maybe thyme. I am sure there are other options.
Thank you Scott and Jaden,
This excites me, but scares me at the same time. It sounds like no real time or energy being spent using this system other than set up (no dragging out the hose to water, no weeding, etc..). Now that it is above freezing point can you tell me the benefit of planting outside in ground and container outside where amount of sun exposure can be determined. Actually, I am thinking about on the deck or patio, leaving more room for tomatoes and peppers in the garden.
I wonder about herbs that can be harvested gradually, and kept for an extended amount of time. I guess the question is just how long can you maintain any one plant with this system?
Thank you again for educating me and sharing your results in general. Monica
Monica,
The Tub system is really well suited for leafy greens. Things that will have less than 45 day growing cycle. Any longer and the system runs low on water. It’s inability to sustain longer term plants like tomatoes and peppers is made up for by it’s simplicity. If you are looking for something to grow long term herbs and even tomatoes in easily then look into EarthBox 1010039 Organic EarthBox, Terracotta
. They are amazingly simple once set up and last an entire season. They are also reusable the next season.
Frances and Spanky,
What we grow our food in is always a concern. The dangers of chemicals leaching into our food system are numerous to say the least. I am glad you mentioned the concern here in the comments. I was going to address this in the original post (and I may add it later), but it slipped my mind.
When selecting a plastic container to grow your food in, I am looking for food grade plastics that are used in the food industry. This lessens the likely hood of chemical leaching issues. If I can’t find something used in the food industry or, I find a perfect container I like, I look for the recycle numbers on the plastic container. It’s the number inside the recycle arrow triangle.

Avoid plastics numbered 3, 6 and 7. The tubs I am using are HDPE or recycle number 2.
I had to make a decision early on when building my aquaponics and hydroponic systems when it came to the use of plastics. What it finally came down to for me was knowing exactly what my food has been exposed to as far as persticides, fertilizers and chemicals within reason. I have far more control over what goes on in my garden than I do when I go to the grocery store. Who knows what has touched, been sprayed on, or used in processing a store bought celery? If I remember the Environmental Working Group (EWG) found 64 different chemicals in or on celery when grown in our conventional food system, putting it on top of the EWG’s Dirty Dozen. If we were to think about all the things that touch our food or are introduced during our industrial food process, we could drive ourselves batty. Don’t get me wrong, I am all for keep things as safe as possible. We as a society need to keep pushing forward the research on food safety. In the mean time, I am choosing to grow some of my own food, and some of that food is grown in plastic containers. But, I know that I have not sprayed a single pesticide or preservative on a single head of my lettuce.
Have you tried using Perlite for the growing median instead of rapid rooter plugs?
Joanne,
I haven’t tried using perlite in this particular instance. We do use perlite and vermiculite in our hydroponic root vegetable pots. The easy and simplicity of the Rapid Rooter plugs swayed me to stick with them until my supply runs out. I will try perlite on a future planting.
This looks great. I can’t wait to read in more detail. My main concern though would be growing food in plastic containers..
http://www.motherjones.com/environment/2014/03/tritan-certichem-eastman-bpa-free-plastic-safe
Scott,
Thank you for this informative post. This looks awesome and very doable.
I am wondering if there would be any concern regarding the plastic tubs leaching chemicals into the water/plants when they are sitting in the hot sun.
Thank you again,
Fran
thank you for this post! i am a blog lurker 🙂 this is my first comment here! i have always wanted to garden but in a few of my attempts, i realized that i have no knack for it. however, this is something i would love to try. i have a couple of questions, though – i live in north texas. we’ve had some weird weather this april (aka not super hot yet). 1) is it too late for me to try this? 2) what other vegetables could i grow using this particular tub system (asides from leafy veggies)? thank you so much!
Michelle,
It’s not too late to start! Look for heat tolerant varieties of vegetables. Jonny’s Seeds has a good guide for heat tolerant varieties. If your weather is hot and dry, watch the water level in the third and fourth weeks. If it gets down to an inch or so deep, add about an inch of pH adjusted water to keep the roots from drying out. Do not refill the tub to the top. That will drown the plants. I have only experimented with leafy greens so far. I suppose things like cabbage and broccoli should do well, but I would reduce the number of plants per tub to two. Things with a shorter growing cycle under 50 days will probably work. Longer than 50 days, we would be looking into nutrient solution changes and that would make things much more complicated. Things like tomatoes, beans and peppers would be better suited for container gardening. Check out the post on Earthbox Gardening. Potatoes and other root crops would need something like our Potatoes in a Barrel Experiment or a wicking bed. Check out the size of the these hydroponic carrots.
This. Excites. Me. You can’t begin to know how much! I’m growing lettuce in pots in my carport at the moment, and I’m going to go out in a moment and plant more, and some peppers, too. I can’t bring those big pots in when we get a hurricane, though. Some smaller tubs and jugs would be easier to manage. I’m a Florida retiree and we’re all getting pinched really hard by high food prices, so I’d love to see more of us gardening in this manner. Please keep up the experiments and posting on your methods. It is exceptional information, so thank you!
Hi Barbara – I can’t believe how much vegetables cost at the market! Yes to grow your own. Especially lettuce! Imagine picking a few leaves every day for a salad. The leafy lettuce varieties are the best. Since it gets so dang hot here, try looking out for “heat tolerant” lettuce.
Nice diy and tips! Wow, the plants grown really well! Hope to try very soon 😀